Printing Information Portal
Here you will find a wide range of information about printing and plotting at the GSD
Installing Printers For Windows
The first step is to create a Connection to the GSD Print Server
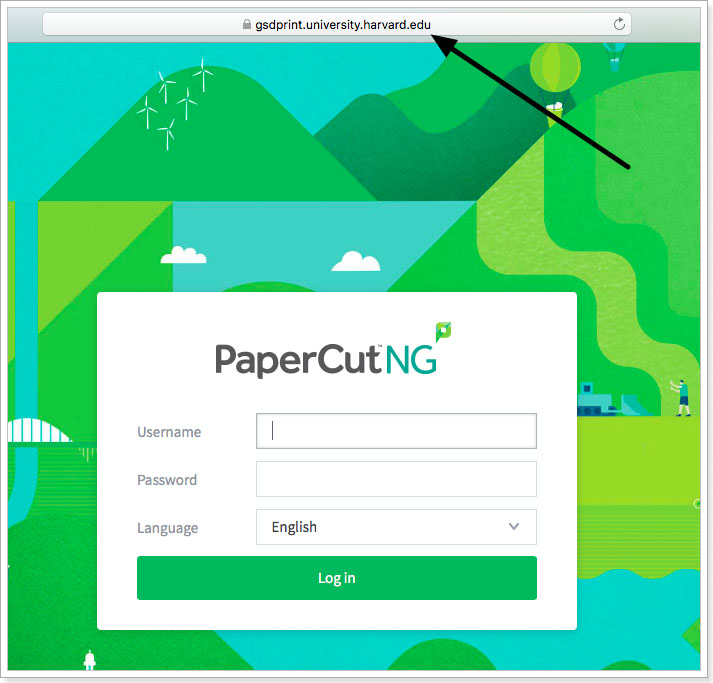
In the Windows search box on the Windows taskbar type:
\\gsdprint.university.harvard.edu (as shown below) and press Enter.

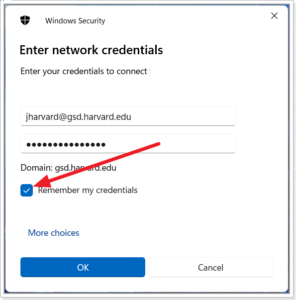
If prompted, enter your HarvardKey Credentials, and Select Remember my credentials (as shown below). Otherwise, you will have to repeat this step every time your computer restarts!
After successfully authenticating, a new window containing a list of printers will appear. Navigate to the PCClient folder, and Right-click on the InstallPrintDeploy.bat script file, choose Run as Administrator. Accept the default selections.

Once the installer finishes you may be prompted to log in with your HarvardKey username and password again.
The PaperCut PopUp will display your current print balance in the upper right corner of your screen, you may close this pop-up window – the service will continue to run in the background.
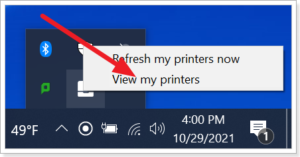
The Print Deploy utility also runs in the background, you can launch Print Deploy from the Windows System Tray, choose View My Printers (as shown below).
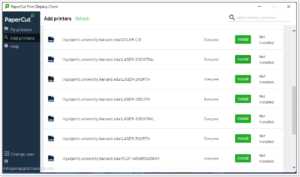
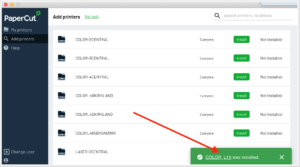
Install the printers you wish to add by selecting Add Printers. Our naming convention for printers is [PrinterType-Location]. Click here for a complete list of our shared printers.
Once the printer has installed successfully you are done!
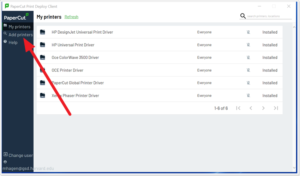
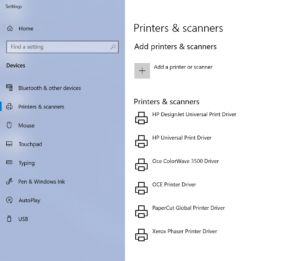
Note: In your list of printers you will see Print Drivers (as shown below). Although they appear as printers, they are simply support files, and can be left alone.
Note: Printing is an on-campus activity on a Harvard Network. Please do not attempt to print from remote locations
Installing Printers for Mac
Note: Due to compatibility issues, printing to the large format plotters is not currently supported. Mac users can print to the plotters either using Windows installed on their Mac via Parallels or BootCamp, from one of the printing stations setup in the 3rd floor plotting area or in L19, or from the computer lab in the lower level of the library
PaperCut is the application used to manage authentication, print tracking, and cost recovery. Start by downloading the PaperCut print client. Then, copy the app into your applications folderOnce the app is copied into your applications folder, add it to your user account's login items Open System Preferences and click on General Select Login Items and select the plus sign Click on Applications and then click the PaperCut app then click Open. This will ensure the PaperCut app will launch automatically every time you login to your computer.


Once the app has been copied and added to the login items, CTL+Click the app and choose Open If you do not CTRL+Click and choose open, you may receive a warning that the client is untrusted and will not open, Ctrl+clicking enables a different menu that should allow you to choose to Open the app anyways Once the app launches, you'll be prompted to authenticate using your HarvardKey credentialsOnce installed successfully, the client will run in the background and will prompt you to authenticate when you print to a GSD printer
You should see this pop-up, with some options for remembering your credentials
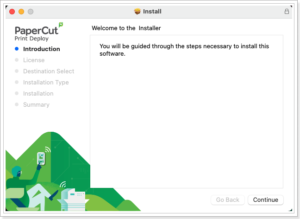
Install Printers on your Mac using the PaperCut Print Deploy Client

The PaperCut Print Deploy client makes it easy to install GSD shared printers

To begin, Download PaperCut Print Deploy

Launch the installer and accept the default settings to complete the installation (they might take a few minutes to install)

Don't change the name of the installer; it tells your computer where the printers live
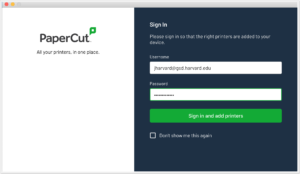
Once installed, you will be prompted to login to the PaperCut with your HarvardKey login information
The Print Deploy client should appear in your taskbar, use it to refresh the list of shared printers and to open the client to install additional printers

Once the client opens, select Add Printers and the list of shared printers should appear

Click Install next to the printers you'd like to use to install them on your computer
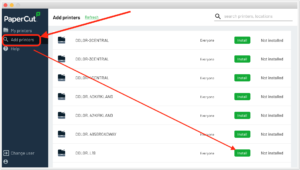
The client should indicate when the printer has been installed successfully
The Papercut printer should now be available to your applications, if you do not see it immediately, try closing and re-opening the application

To view information about your account and transaction history visit the PaperCut user web portal
Note: Printing is an on-campus activity on a Harvard Network. Please do not attempt to print from remote locations
How much does printing cost?
Printing costs are shown in the table below
Print charges incurred by students will be reflected on their term bill.
Your printing activity and transaction history are available on PaperCut Note: PaperCut is an internal site and can only be accessed from one of the Harvard networks or through a VPN connection.
| B & W Laser Jet | Letter Size | $0.05 |
| B & W Laser Jet | Tabloid Size | $0.10 |
| Color Laser Jet | Letter Size | $0.25 |
| Color Laser Jet | Tabloid Size | $0.50 |
| HP PageWide
HP PageWide-2 |
per Linear Foot
per Linear Foot |
$1.00
$2.00 |
| Oce ColorWave | per Linear Foot | $2.00 |
| HP DesignJets | per Linear Foot | $2.00 |
How to request a refund?
Printing Refund Policy

Printing charges that are eligible for a refund
- Any problem directly related to equipment failure
- Poor print quality, i.e. not enough toner, streaks or ink blotches
- Issues with the print queue not releasing jobs to the printer
Printing charges that are not eligible for a refund
- Issues that occurred greater than ten days from the time of the refund request
- User has a history of requesting refunds that is beyond reasonable
- User was printing from an unsupported operating system
- Digital content was not formatted correctly
- User waited too long to collect their output
Process for requesting a refund
To request a refund, log into your PaperCut account (VPN required when outside of Harvard networks). Navigate to “Recent Print Jobs” and find the job you want to be refunded for. You can only request a refund for issues that occurred within the past ten days. Click on the “request refund” link. Make sure to provide a reason.
What happens next?
If Help Desk approves your refund request the charge for that print job will be removed from your PaperCut account.
Ways to avoid printing problems
- View the documentation on How to Plot
- Retrieve your document immediately after you send it
Where are printers located in Gund Hall?
Our naming convention for printers is [PrinterType-location]. For example, Laser-3North is a laserjet located on the third tray, north side. Here’s a complete list of the printers we provide for anyone at the GSD to use. Each printer is load with Letter size (8.5×11) and Tabloid size (11×17) paper.
LaserJets

Laser-2North, Laser-2South, Laser-3North, Laser-3South, Laser-4North, Laser-4South, Laser-5Central, Laser-L19 (Help Desk)
Large Format


Plot-Oce-1, Plot-Oce-2, Plot-Pagewide-2 (all located in the third tray – central)
Plot-Oce-4, Plot-Pagewide (located in Gund Hall, Room L19)
Plot-485 Broadway (2nd Floor Resource room)
Large Format, “load your own paper”

Two DesignJet T1700s are located in L19 and must be used through the provided computer consoles next to the printers in Room L19.
How do I check my transaction history?
Check your Transaction History using PaperCut. Please Note: This is an internal site and can only be accessed remotely with a vpn connection
Can I load my own paper?
All Printers have the capability to load your own paper
Laser jets – Paper has to be laser jet compatible. Paper can be loaded from the side tray, tray 1.
SheetFeeds Plotters: maximum roll length 44inch , compatible with 2inch and 3inch core rolls.
Paper should be inkjet compatible
Hp recommends:
Matte Paper – General-Purpose
Natural Tracking Papers
Thin Papers (< 90 g/m2)
Light Coated Papers (< 110 g/m2)
Heavyweight Coated Papers (< 200 g/m2)
Cockle-Free, Very Thick Coated Papers (> 200 g/m2)
Matte Paper – Photographic
Glossy Paper
Translucent Paper
Transparent Film
Printing Tips and Known Issues
Flattening a Complex PDF File
If your PDF file takes a long time to open, and you can see each layer being drawn on your screen one at a time, it is a good indication that you will not be able to print it. Here are a few techniques for making a complex file printable.
Merge Your Layers
If you have multiple layers in your project file you should merge them together by combining them into one layer. Make sure to do this in a copy of your project file because merging layers cannot be undone.
Print to PDF
Print-to-PDF using the Adobe PDF Printer (installed with Adobe Acrobat DC) is the best way to generate a printable PDF file. This is the first step in reducing the complexity of your document. Do not Export or Save to PDF from applications like Illustrator or InDesign.
Sanitize PDF in Adobe Acrobat
Adobe offers a feature previously called Sanitize Document, and now called simply “Remove Hidden Information”
This feature is designed to remove hidden personal information from a document before it is distributed, A nice side-effect of this process is that it creates a much flatter version of a PDF that is easier to print. In Acrobat DC select TOOLS -> PROTECT -> REMOVE HIDDEN INFORMATION. Now try to print your file!
Print as Image
Alternatively, you can save your PDF or InDesign File as a .jpg and print it from Photoshop.
Do Not Compress your File
When you send a compressed file to the printer the printer has to uncompress it. So, you are actually adding to the processing load! A small file is not necessarily a flattened file.